
Verifying your business on Meta is an important process to increase your brand's credibility and get access to more advanced platform features, such as permission to use the WhatsApp API.
By verifying your business, you confirm that it's a legitimate entity and that you are its authorized representative.
Warning! To verify your business, you must have admin permission to access Business Manager.
To activate a number via the WhatsApp API your business must be verified on Facebook Business. Without Page Verification, you can't use WhatsApp API services.
To access Meta's Business Manager you must be an admin of the account, otherwise you won't have access to the settings shown in this article.
How to verify your business on Meta
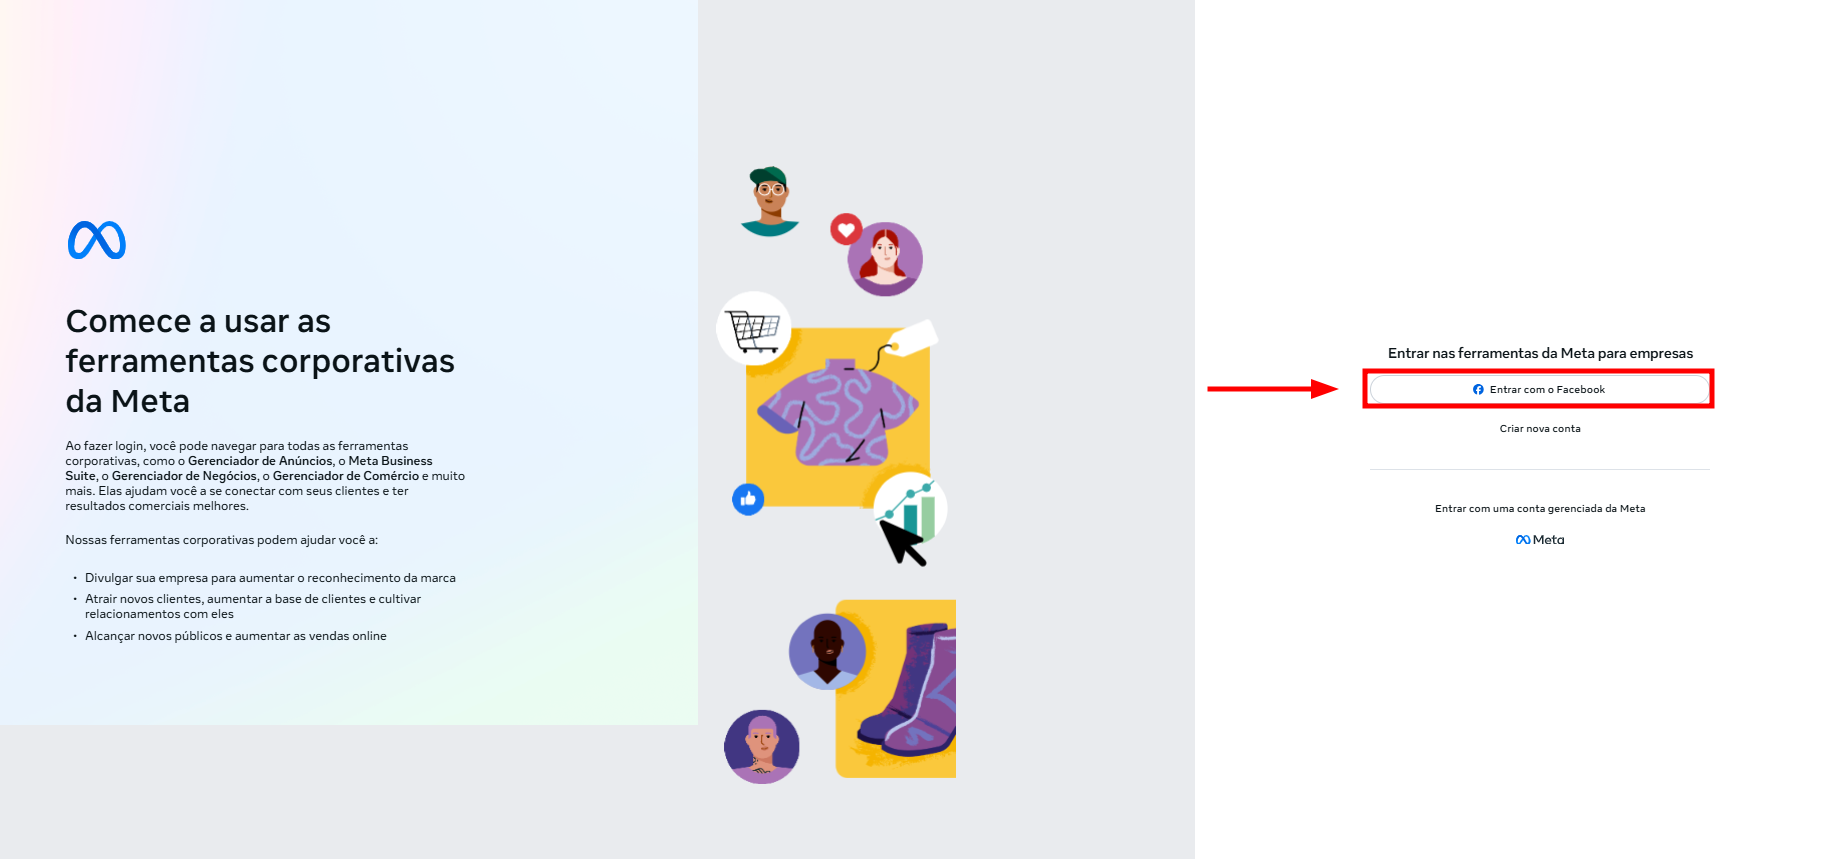
1. Open Business Manager through the link https://business.facebook.com/settings/security and click “Log in with Facebook”.
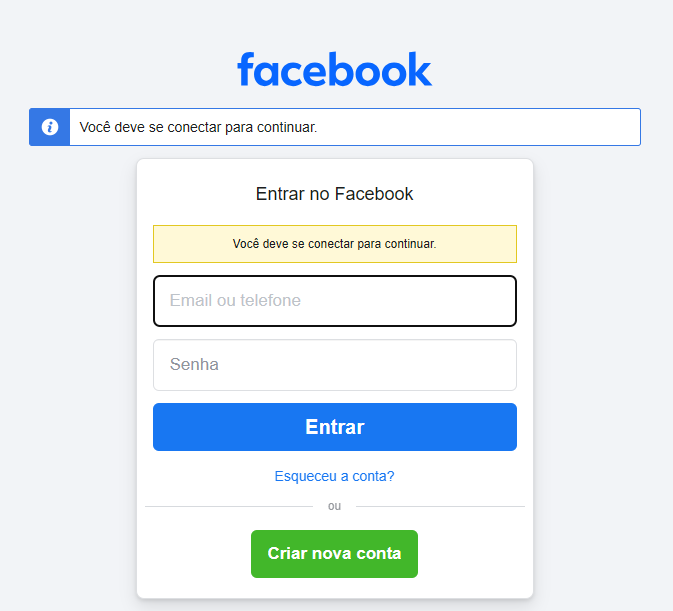
2. Enter your email or phone number and your Facebook account password.
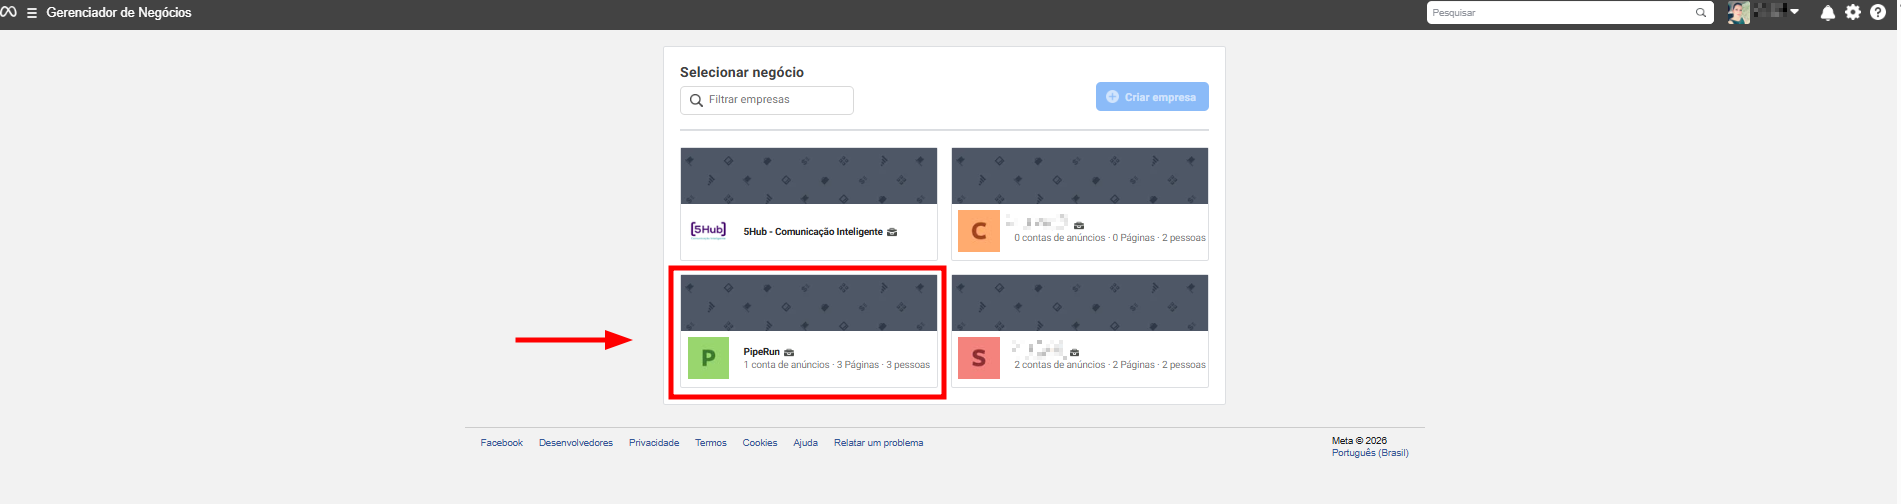
3. Click the portfolio to select the business you want to verify.
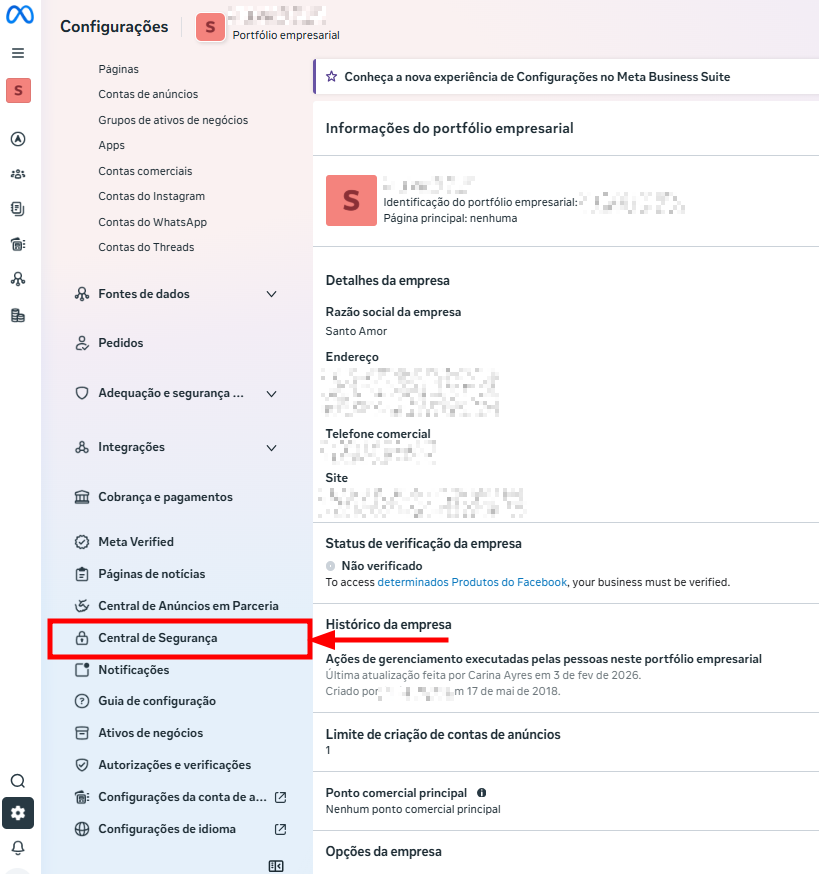
4. In the side menu, click “Security Center”.
5. On the next screen, click “Start verification”.
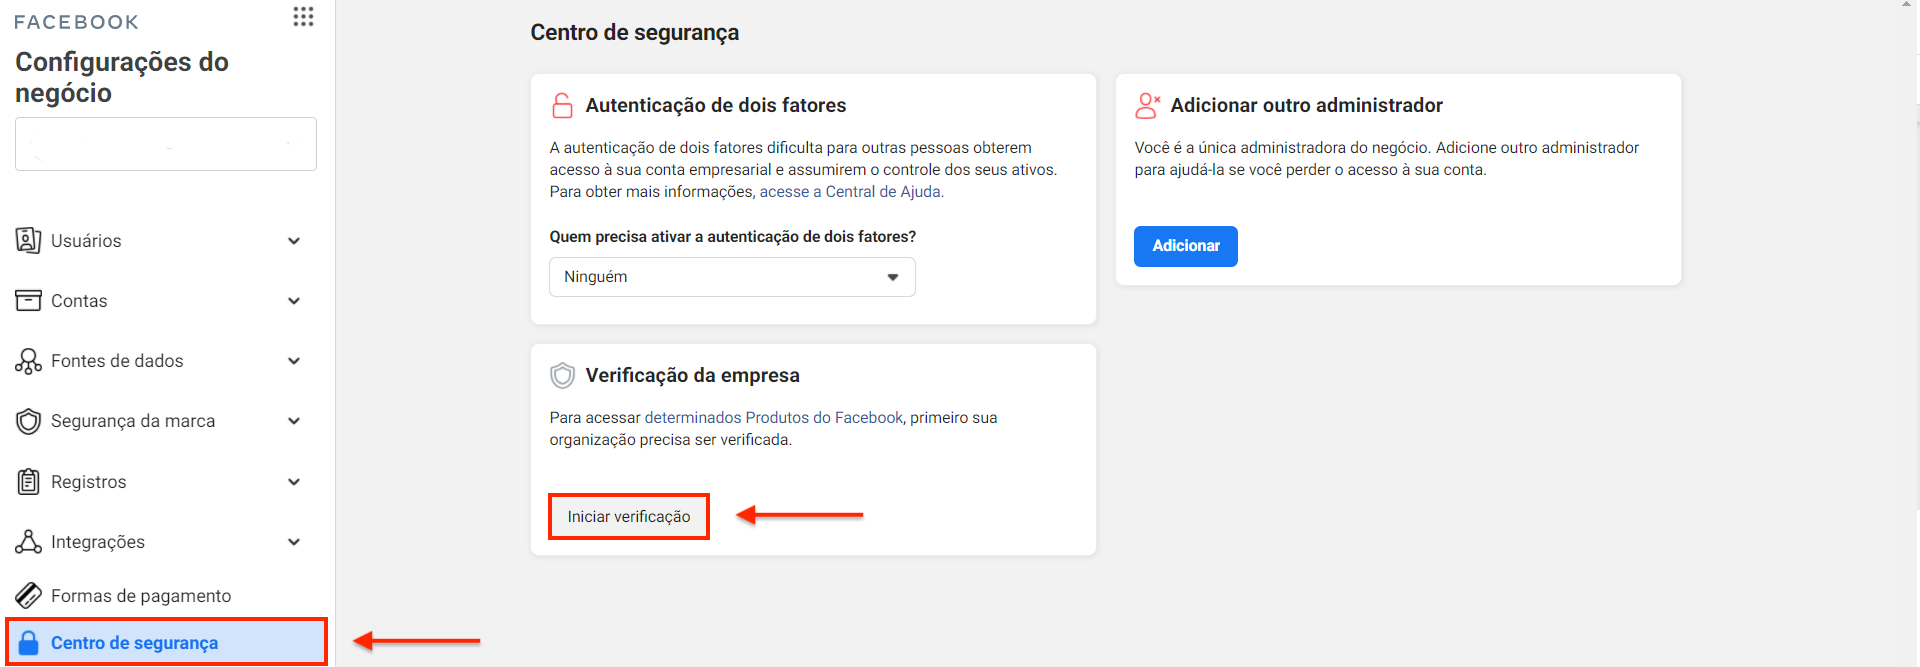
Warning: Some businesses don't qualify for the verification process right away,
because Meta prioritizes verification only for accounts that show
an immediate technical need. That's why the ideal recommendation
is to activate your official WhatsApp API first.
During that process, Meta's own system will identify the need and request business verification,
automatically enabling the document upload button that was
unavailable before.
6. Click “Get started”.
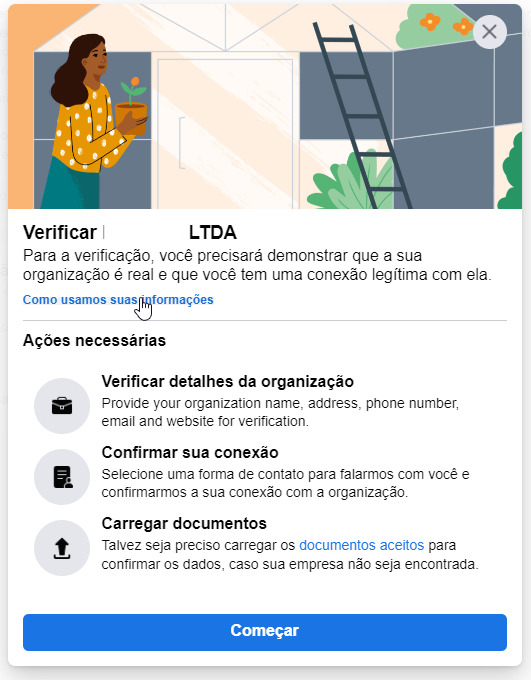
Tip: To see which documents are accepted for verification, check this link.
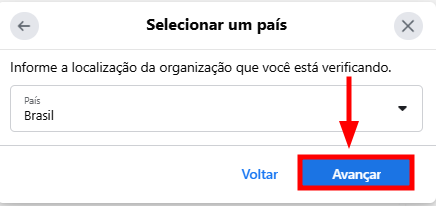
7. Select the Country and click “Next”.
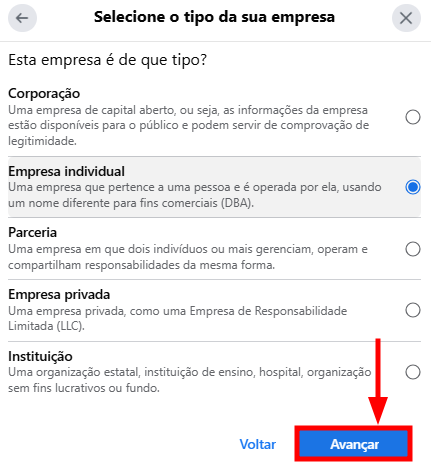
8. Enter your business type and click “Next”.
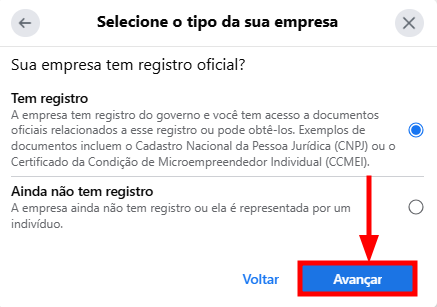
9. Confirm whether your business is officially registered and click “Next”.
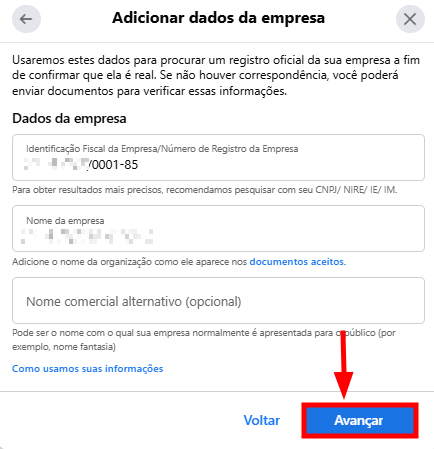
10. On the next screen, correctly fill in all your business details and click “Next”.
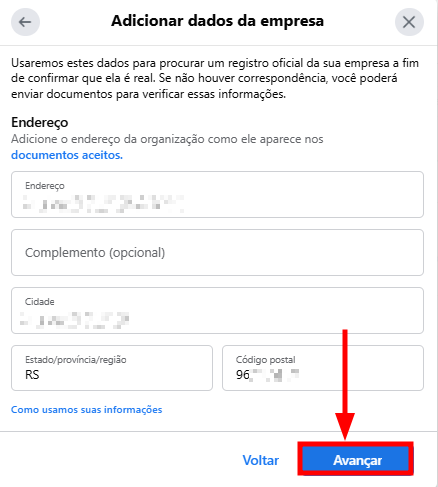
11. Enter your business address details and click “Next”.
12. Enter your contact phone number and the business website.
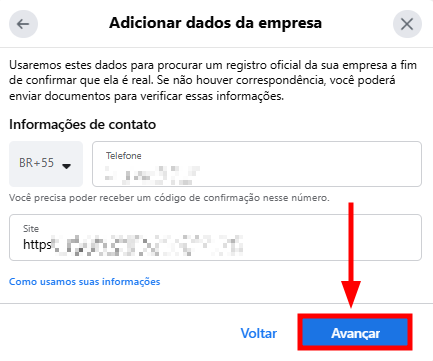
Tip: When you enter your business website, make sure its home page shows the business's CNPJ and address with phone number. This information speeds up the verification process.13. If your business information can't be identified through the website entered in the previous step, you'll need to upload documents containing that information. Select the channel where you want to receive the document submission confirmation and click “Next”.
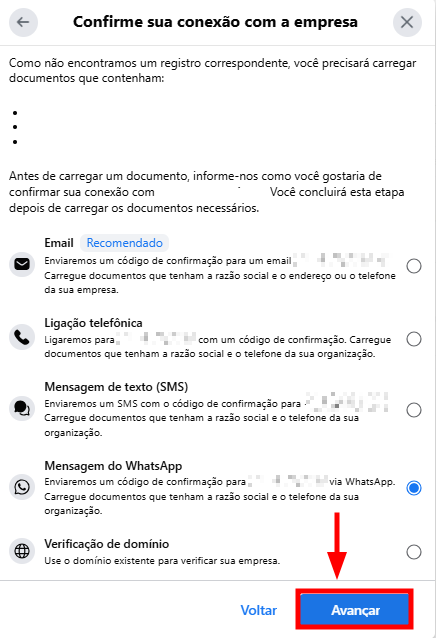
14. In the next step, select the type of document you want to send.
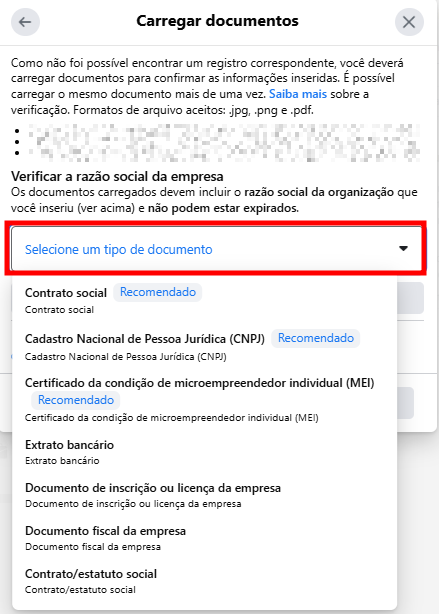
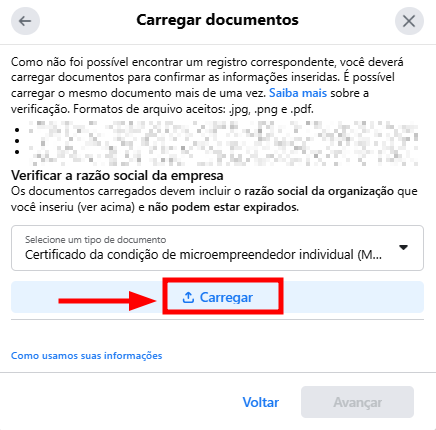
15. Upload the documents.
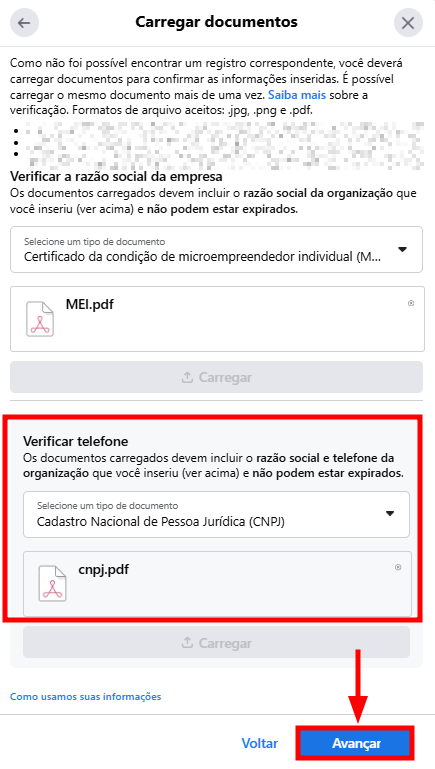
16. Also upload the document containing the business's official phone number and click “Next”.
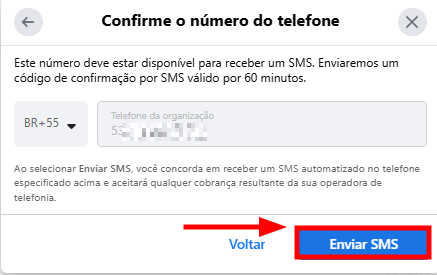
17. Confirm your phone number and click “Send SMS”.
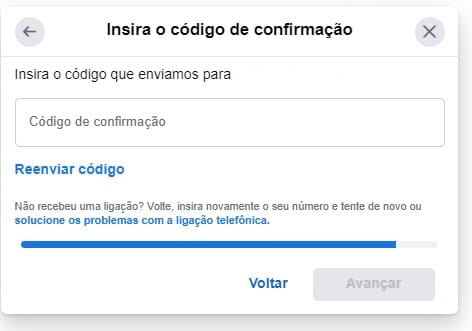
18. Enter the code you received and click “Next”.
19. After you submit the information, the request goes into review and should take about 2 business days. Click “Done” to close the notification.
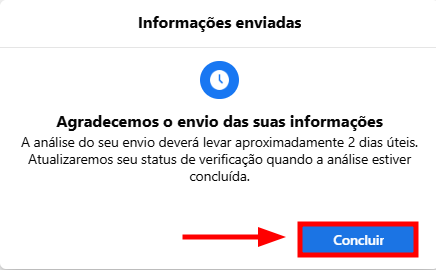
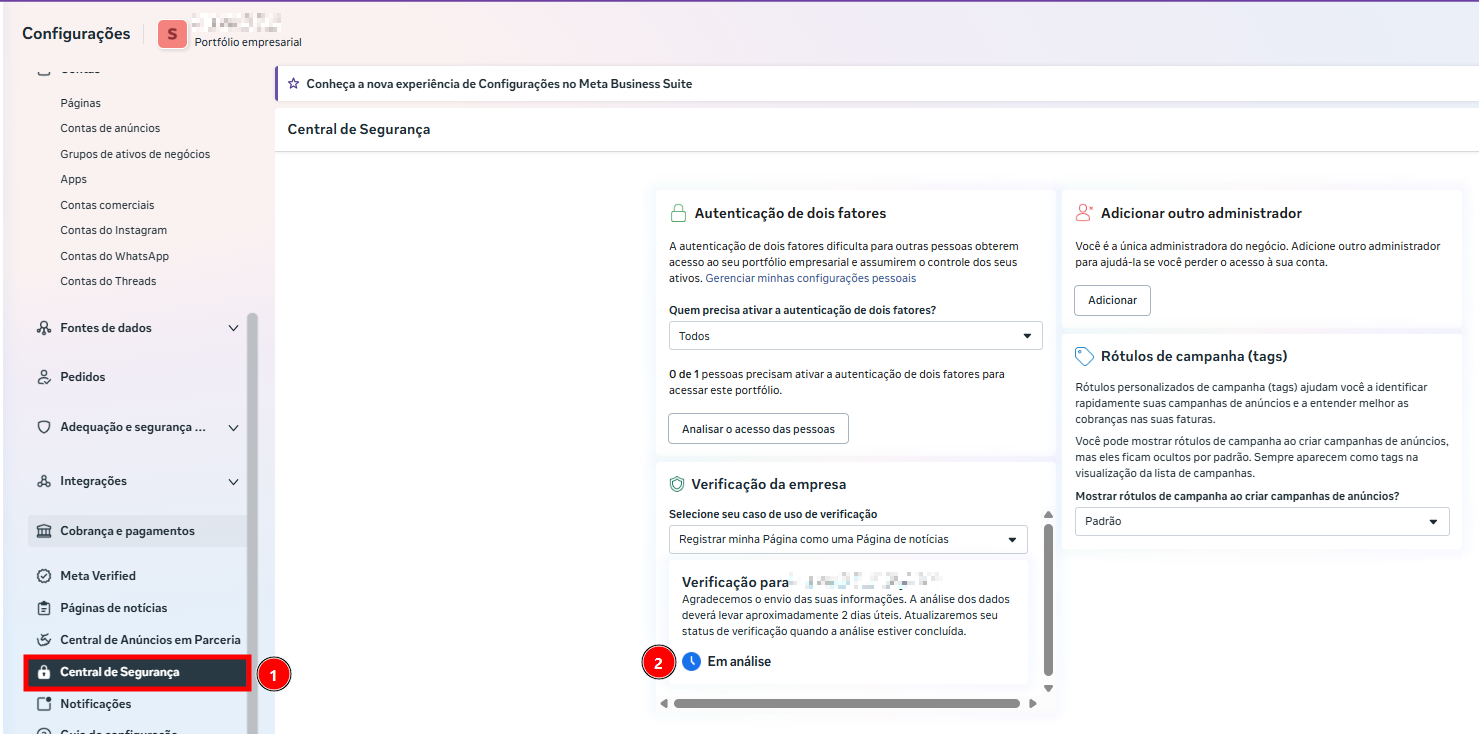
The estimated review time is about 2 business days. We recommend checking Business Manager daily to follow the review's progress. If your request is denied, you can try again by sending other documents for review.20. To track the verification process, go to the “Settings” menu, open “Security Center” (1) and check whether your business shows as “Verified” or “In review” (2).
Done: your business verification request has been sent to Facebook.
The list of documents Facebook accepts for business verification can vary by country and by each business's specifics. However, some documents are commonly accepted and can be used to prove your business's existence and legitimacy.
Most common documents:
-
Bank statement: a recent statement from the business's account, showing the business name, account number and address;
-
National Registry of Legal Entities (CNPJ): the business's registration document, proving its legal existence;
-
Individual Microentrepreneur Certificate (MEI): for businesses registered as MEI;
-
Articles of association (Contrato Social): the document that formalizes the business's incorporation, with the partners' information and corporate purpose;
-
Utility bill: water, electricity, phone or other utility bills in the business's name, with the address matching the one registered on Facebook.
Warning! Facebook's policies may be updated periodically, so it's always a good idea to check the latest information before starting the verification process. To see the updated list of accepted documents, check this link.